From the parking area, we couldn't see either of these stunning Uberpeaks. Hiding their massive summits behind flanks of rubble, they evaded our gaze. Wow! Every Desert Peaks List peak has a great climb or a great view or both! Yeah. Right. Whatever.
Walking west-northwest from the trucks, we dropped a little bit of elevation to skirt some outcroppings. (This was a good idea, demonstrated by my attempt to side-hill a level path on the way back.) After crossing a couple of poorly defined washes (that show up as streams on the topo map) we went over the knob at waypoint DRYMT2. This knob is just south of the prominent wash which leads to the ridge you have to go over before even seeing Dry Mtn. Stay out of the wash for a while to avoid loose rocks, then drop into it and follow around a couple of turns to about 7200'.
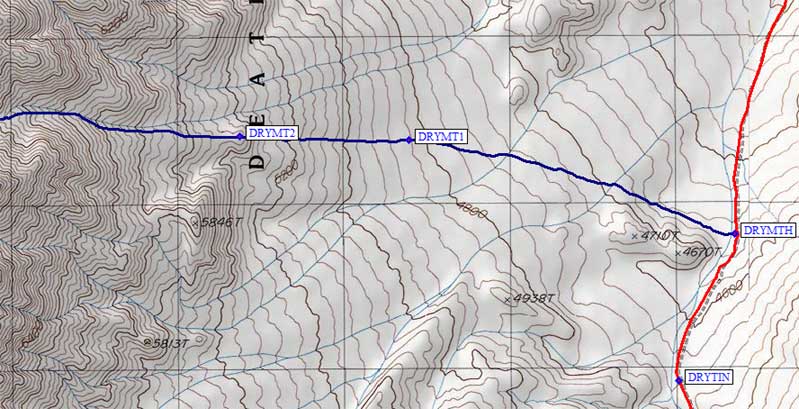
The eastern part of our route:
Here (at waypoint DRYMT3) we found a tin can full of small rocks, marking where it gets ugly! On the way up we went north as we climbed 300-400', then sidehilled southwest to the ridge. On the way down, we followed the prow of a minor ridge which doesn't really show on the topo map, re-joining the wash at the tin can (DRYMT3). Either way, it's gonna be loose and steep. Either way, we thought the best place to cross the ridge was 7900' at waypoint DRYSAD. This is not really a saddle but a great place to start sidehilling to Point 7934 and waypoint DRYMT4. Follow easy terrain 700' down into the valley (waypoint DRYVAL), and start climbing up again!
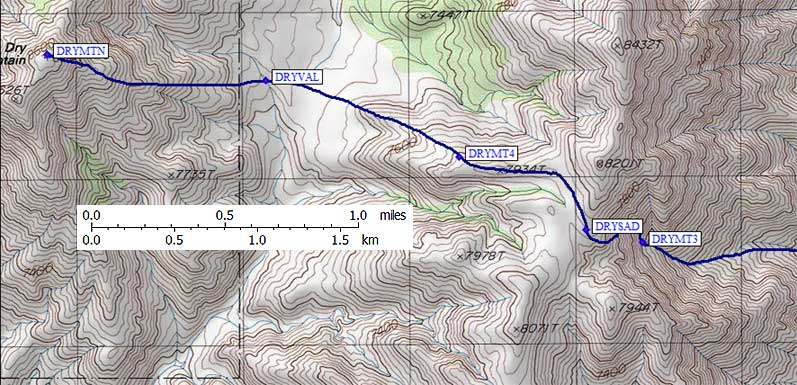
The western part of our route:
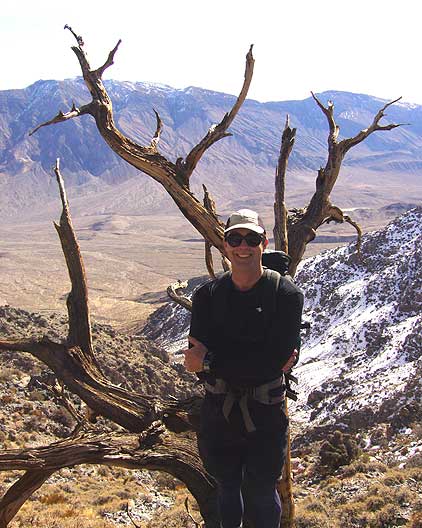
Between the tin can and the saddle, Steve finds his first tree.
(Yes, it's dead. But this is Dry Mtn and it is in Death Valley after all.)
From the ridge you can see the remaining down-up (and down-up) grunt to (and from) Dry Mtn.
It's fairly straightforward from the saddle to the summit, but we had to content with a bit of snow along the way. The climb to the summit wanders on ledges and around brush, but doesn't present any real routefinding challenges.
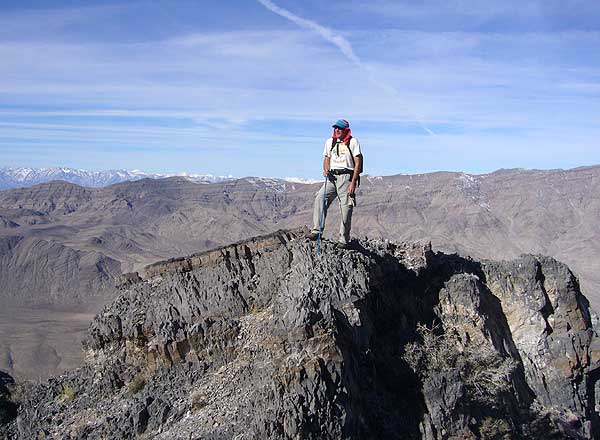
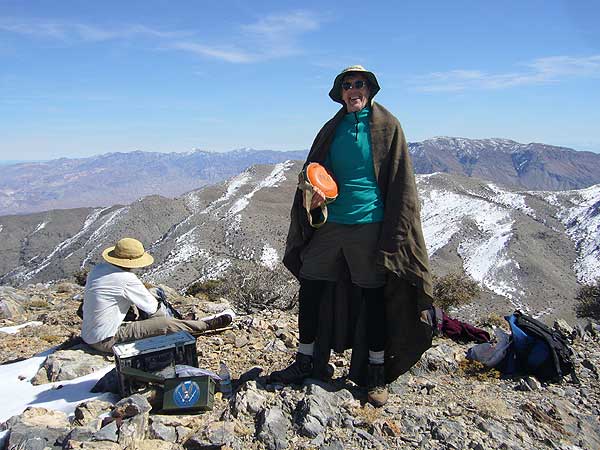
Jeff models the fashion accessories (canteen, blanket, etc) stuffed in the oversize summit register box.
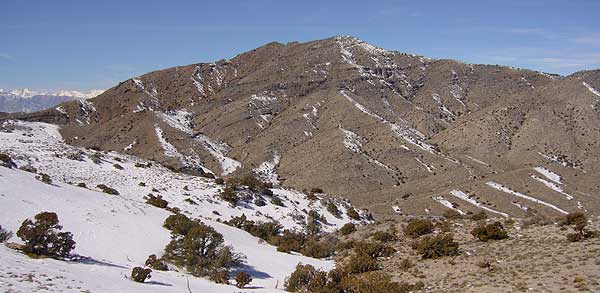
On our way back, this is the view of Tin from the Dry saddle.
Our climbing route is marked in red on the photo and blue on the map.
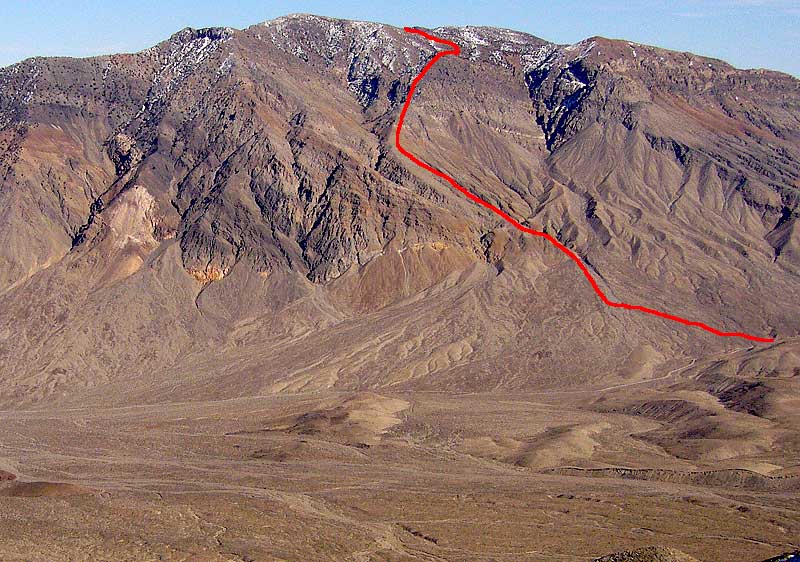
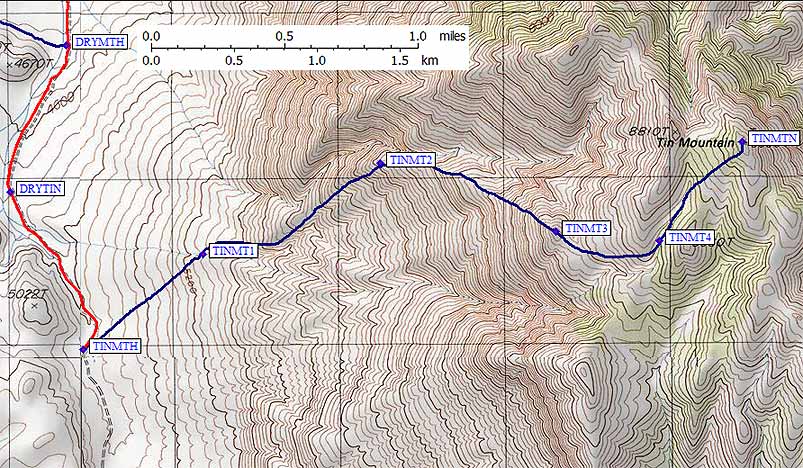
The next morning we started earlier for the easier of the two peaks. We wanted to knock it off and then drive to Palmer and Grapevine. We left from the higher trailhead (waypoint TINMTH, another wide spot by the dusty dirt road) and traversed up and northeast through some small dips that hide the vehicles when returning. Going a bit too high, we had to scramble across the wash that defines the start of the real climbing. It's better to cross a bit below the mouth of the canyon (waypoint TINMT1), then get on the ridge which forms the north side of the canyon as the ridge begins to form.
The climbing is very steep up to about waypoint TINMT3, with a sometimes good use trail on the ridge or on the south side of the ridge. From where the ridge levels off and you start to encounter trees, it's easy to stay too far left and climb the false summit. It's better to stay low, go over the false summit's south ridge, and walk up the very pleasant drainage between Point 8660 and Point 8810, then turn northeast for the final 'push' up to Tin.
There was time for Daryn's hero shot on an outcropping half way up Tin.
It was the best view of the day!